
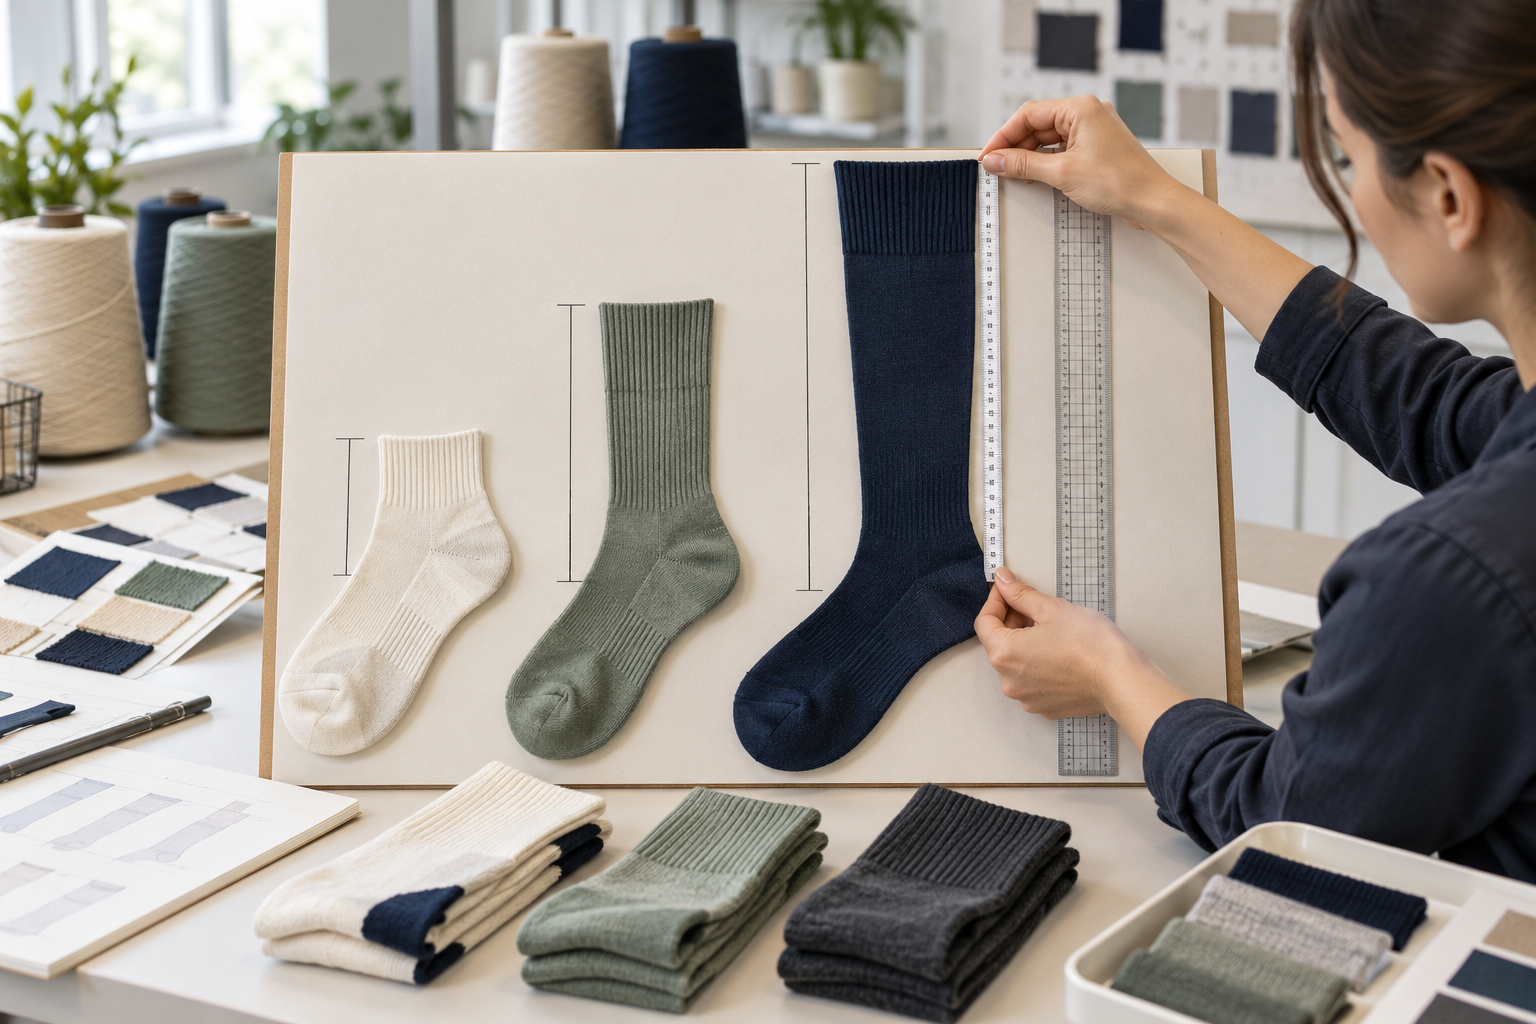
How to Specify Custom Sock Cuff Height for Different Uses
Direct answer
Specify custom sock cuff height by naming the intended use, the measurement method and the reference points used on the sample. “Ankle,” “crew” or “knee high” describes a general silhouette, but it does not tell a factory exactly where the finished cuff should sit or how the measurement should be checked.
Before production, approve the cuff height on a physical sample and confirm how it will be graded across the size range. The most useful specification is not a label alone; it is a measurable instruction connected to the sock construction and buyer use case.
Why cuff height affects the buying decision
Cuff height influences the appearance of a team kit, the amount of visible branding, the relationship between the sock and footwear, and how the pair is folded or packed. It can also affect whether the buyer considers the sample suitable for the intended programme.
Different buyers may use the same general sock name for different expectations:
| Use case | Cuff-height decision | What to confirm |
|---|---|---|
| Low-cut athletic programme | Keep the cuff below the intended shoe opening or visible ankle line | Finished height, cuff depth and left/right consistency |
| Crew athletic or lifestyle range | Create a repeatable visible leg proportion across the size run | Measurement point, height by size and artwork position |
| Team or club kit | Match the planned uniform and any stripe or logo zone | Cuff height, stripe layout, logo clearance and size grading |
| Knee-high or extended-leg programme | Confirm where the top edge should finish on the target wearer | Finished height, top-edge construction, circumference and sample fit review |
| Private-label retail pack | Make the folded pair look consistent on the shelf or in the package | Fold presentation, visible height and pack-to-pack consistency |
These are buyer decisions, not performance guarantees. Final construction must follow the approved brief and sample.
Step 1: Choose a height name, then add a measurement
Start with the familiar product description so the project team understands the direction, then add a measurement instruction. For example, a brief can state “crew-height sock, measured from the heel join to the top edge on the relaxed finished sample.” The exact wording should match the construction used for the project.
Avoid mixing different measurement methods in one order. A measurement taken from the heel join cannot be compared directly with one taken from the sole or toe unless the reference is clearly converted.
Record:
- the starting reference point;
- the ending reference point;
- whether the sock is relaxed or gently extended;
- whether the cuff rib is included; and
- the acceptable tolerance to be confirmed for the project.
If a tolerance has not been agreed, leave it as a confirmation item. Do not invent a standard number simply to fill the specification.
Step 2: Match height to the application
The correct height depends on what the buyer needs the sock to do visually and commercially. A club kit may prioritise uniform appearance, while a retail brand may prioritise a consistent folded presentation. An athletic programme may also need the cuff and logo to remain clear of another design zone.
Use these questions before sending a production brief:
- What footwear or uniform will be used with the sock?
- Is the cuff meant to be visible, hidden or part of the product identity?
- Will stripes, logos or colour blocks sit close to the cuff?
- Is the sock sold as one size group or several size groups?
- Will the pair be folded, rolled, boxed or displayed flat?
The answers help the supplier recommend a construction direction without turning a broad height label into an unmeasurable instruction.
Step 3: Define the cuff itself separately from the leg height
Cuff height and cuff depth are related but different. The leg height describes where the top edge sits on the sock. Cuff depth describes the knitted or finished band at the top edge.
A useful brief separates them:
| Specification item | Buyer should describe |
|---|---|
| Overall sock height | The measurement from the agreed reference point to the top edge |
| Cuff depth | The height of the cuff band or rib section |
| Top-edge direction | The intended finish and visual edge appearance |
| Leg proportion | The amount of visible leg above the heel or foot section |
| Artwork clearance | The space needed between the cuff and any logo, stripe or pattern |
This prevents a common misunderstanding: two samples can have the same overall height but look different because their cuff depths and leg proportions differ.
Step 4: Check the measurement on a physical sample
The sample review should use the same method that will be used for the production check. Lay the sock flat without pulling it longer than the agreed condition. Measure from the defined reference point to the top edge, then record the result for each sample size.
Also inspect:
- whether the top edge sits level around the opening;
- whether the cuff depth is visually consistent;
- whether the sock twists when laid flat;
- whether the pair matches left to right; and
- whether the cuff, stripe and logo positions remain clear together.
For an extended-leg sock, review the sample on the intended leg or over the relevant garment only if that is part of the buyer's use case. A flat measurement alone cannot answer every fit or styling question.
Step 5: Plan size grading before bulk production
One cuff-height measurement may not produce the same visual proportion across every size. Ask the supplier to show how the height will be treated by size group and which reference point will remain constant.
The approval record should include:
- size groups included in the order;
- intended finished height for each group or the approved grading rule;
- cuff depth by group if it changes;
- logo and stripe position relative to the cuff;
- sample size used for approval; and
- the action required if the buyer changes the size range later.
If the size range, footwear, uniform or cuff design changes, reopen the height review. A previous sample may not represent the new programme.
Common cuff-height problems
Using only “ankle,” “crew” or “knee high”
These terms communicate direction but not a complete production measurement. Add a defined reference point and sample check.
Measuring from different points
Measurements from the toe, sole, heel join and cuff can produce different numbers. Choose one method and use it consistently.
Ignoring cuff depth
The cuff can make the sock look shorter or taller even when the overall measurement is unchanged. Approve both overall height and cuff depth.
Placing artwork too close to the cuff
Logo or stripe clearance should be reviewed with the selected cuff. A height change can crowd the artwork zone.
Approving one size and assuming the rest will match
Confirm the grading approach. Larger and smaller sizes may need a different height to retain the intended visual balance.
Custom sock cuff-height approval checklist
Before production, confirm:
- The use case and footwear or uniform context are defined.
- The height name is accompanied by a measurement method.
- Starting and ending reference points are recorded.
- Relaxed or extended measurement condition is stated.
- Overall height and cuff depth are specified separately.
- Logo, stripe and pattern clearance is reviewed.
- Size groups and grading treatment are approved.
- A physical sample has been measured and visually checked.
- Left/right pair consistency is confirmed.
- Any change to the size range or cuff construction triggers a new review.
Frequently asked questions
What is the best height for custom athletic socks?
There is no universal best height. Choose it from the footwear, uniform, visibility, artwork and buyer presentation requirements, then approve the measurable sample specification.
How should cuff height be measured?
Use one agreed reference point, such as the heel join, and measure to the top edge under a defined relaxed or extended condition. The exact method must be written into the project brief.
Is cuff depth part of sock height?
Cuff depth contributes to the overall appearance, but it should be recorded separately so the factory and buyer are discussing the same construction.
Do different sizes need different cuff heights?
They may. The decision depends on the intended visual proportion and size range. Confirm the grading rule with a sample set before bulk production.
What if I change the cuff after approving the sample?
Reopen the height, artwork clearance and measurement review. A different cuff can change the visible proportion and the position of nearby design elements.
Related resources
- How to Specify Custom Athletic Socks for Production
- What Should You Confirm Before Sampling Custom Socks?
- How to Specify Arch Support in Custom Athletic Socks
- Custom Athletic Socks
Final thoughts
Cuff height becomes useful to production only when it is measurable and tied to a real buyer use case. State the reference point, cuff depth, grading approach and artwork clearance, then approve the physical sample. This turns a vague style label into a specification that both sides can review before bulk production.